Create a Stunning City Skyline Made of Text | Techbirds
Step 1
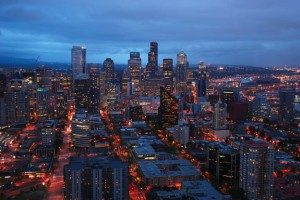
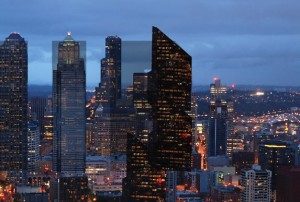
To get started, fire up Photoshop and create a new document sized at 3872×2592. It’s advantageous to use such a high resolution image because it allows us to create detail and accuracy. Place this Seattle cityscape into the document, it should fit flushly
Step 2
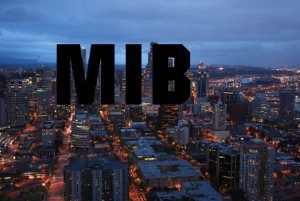
Type out the letters ‘MIB’ in a bold font. I used ‘Autumn’, I think it’s a standard font. If you don’t have it, any similar blocky font should work.
Step 3
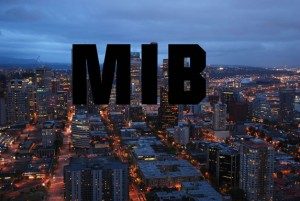
Now we’ll set the tracking so that the letters are spread over a larger horizontal area. Go to your character palette and set the tracking to +75. The size of the font should be around 260 points.
Step 4
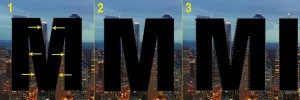
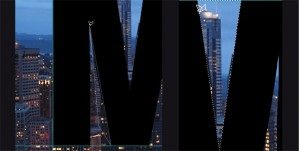
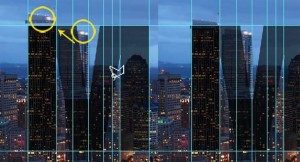
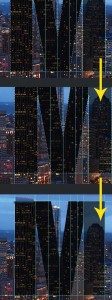
Identify the first road from on the left side of the image and go back to the first row of tall buildings, now place the beginning of the letter ‘M’ to the left of the road. Use the image provided for reference, 1 shows the original text with rounded edges on the inside edges of the M, 2 shows the M with these edges removed , and 3 shows the selection outline of the cut out M, over the original M.
Rasterize the type so its editable by right clicking the type layer and choose rasterize from the list of options that popup. Because we want straight lines, use the polygon lasso tool to cut straight edges where your font is rounded.
Step 5
Set up guides across all the major lines where the type will become the buildings, this will really come in handy. Do this by dragging from the side or top where the rulers are, include any lines you think may help.

Step 6
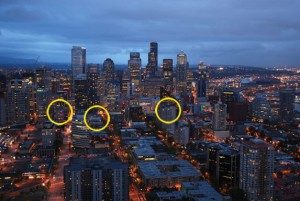
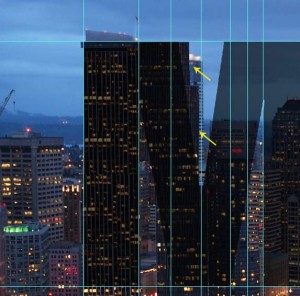
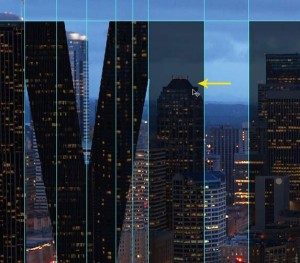
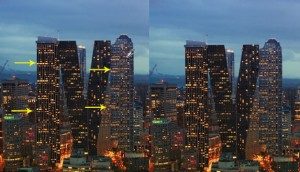
Copy the background (ctr + j) so we can easily change things. It’s always a wise idea to keep an original copy of a layer before you start any sort of destructive process. In the areas referenced in the image below use the clone stamp tool to copy buildings from the front to make the horizontal line at the bottom of the buildings the same. Making sure you are on this copied layer press ‘S’ on your keyboard to get to the clone stamp tool. Now holding down ‘Alt’ to sample an area, copy/clone samples of surrounding buildings to cover over the circled areas in the images below. Then find the area you wish to cover and replace it with the sampled building, remember to resample when you need to.
Step 7
Beginning with the left hand side of the ‘M’ start cutting out the buildings and repositioning like this image. Lower the opacity of the letters to get a better view of how the buildings look. Use the polygon lasso tool for the straight lined shapes, make the selection as accurately as you can, photoshop will help you by telling you when the line is straight. With the selection made using the Polygonal Lasso Tool or your favorite selection method copy the building as many times as you need to cover the left upright of the ‘M’, press ‘Ctrl + J’ to copy, or simply drag the selection with the move tool selected.
Step 8
Build up the first upright of the letter ‘M’ until it’s filled like this. Make sure the windows and lines on the building are all in sync with each other as much as possible.
Step 9
‘Ctrl + click’ the letters layer so it is selected then go to each of the cut out layers and add a add layer mask on the cut out buildings to blend their edges in; this is working non destructively so if anything needs changing later on it can be done easily. The layer mask will hide the area that overlaps the text, they are not erased and can be easily brought back using a white brush or fill.

Step 10
Before we continue cutting out the top of the building directly behind the ‘M’, add a layer mask and blend it in with a soft black brush. If you want to see the overall effect hit ‘ctrl + H’ to hide the guide-lines, click the eye icon on the letters layer to hide the letters, and hit ‘ctrl + 0′ to zoom out. Select all these layers that make up the left side of the M and hit ‘crtl + G’ to group them and rename them left side of M.
Step 11
Where the lower v shape of the ‘M’ covers buildings cut out the buildings as a whole rectangle, using the polygon lasso tool. Reposition them over the left side of the v that makes up the ‘M’, use the move tool and the ‘alt’ key to copy the building. Add layer masks to these buildings, found at the bottom of the layers palette.
Step 12
Then ’ctrl + click’ the letters layer so the letters are selected. Now we’ll inverse the selection by hitting ‘ctrl + I’, which selects everything outside the letters. Making sure your on the layer mask we created in the previous step, brush over the areas that stick out over the letters area with a black brush, until they blend in.
Step 13
Repeat this process for the right side of the v that makes up the ‘M’, cut out the building below it, reposition it, add a layer mask, ‘ctrl + click’ the letters, inverse the selection and brush with a soft black brush over the areas outside the letters.
Step 14
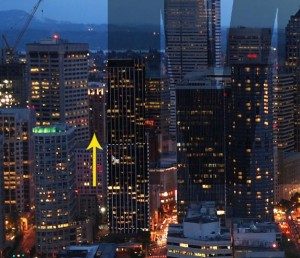
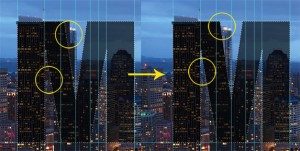
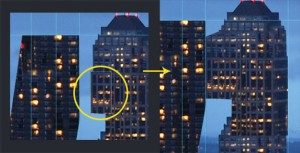
Now for some more photo manipulation. The effect we are creating is going to blend the buildings in seamlessly. We’ll now create more of a contrast between the buildings that make up the ‘M. So copy the background layer that we used the Clone Stamp Tool on before, so we can correct any mistakes easily. ‘Ctrl + click’ the letters and using the Clone Stamp Tool copy the buildings either side of the v in the ‘M’. Use the image below as a reference. Because the image is high resolution and viewed from further back, the buildings do blend in seamlessly.
Step 15
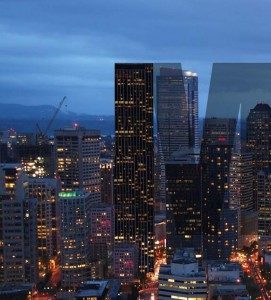
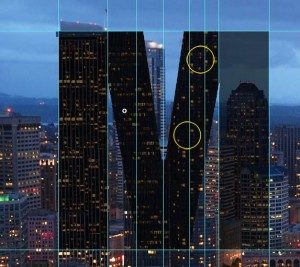
Now we’ll create the right hand side of the ‘M’, using the same techniques as before. Cut out the building directly behind the right upright of the M out. This is the building we’ll be using to create the last part of the letter.
Step 16
Cut out the shape that we need to connect the right side of the ‘M’, copy this to a new layer and position it in place. Turn the visibility of the letters on and repeat this process for the entirety of the right side of the ‘M’.
Step 17
Select all the layers and merge them. Then add a Brightness/Contrast adjustment layer to them to blend the whole building together.
Step 18
Using the eye drop tool, sample one of the windows with no light, then create a new layer on top of the previous one. Spray in randomly where there are groups of light so the building looks more natural, do this for the whole letter ‘M’. This is a subtle effect and only needs to be done sparingly, from a distance the details blend together, which is how pixels work.
Step 19
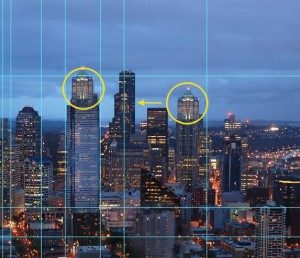
Now we’ll move onto the ‘I’. Hide the ‘M’ for now and find the first tall building on the right (the one we cut the top off before) and cut out the main body of this building from the background copy, use the Polygonal Lasso Tool. Then place it at the bottom of the ‘I’ and rotate it counter clockwise so it lines up with the shape of the letter.
Step 20
Using the move tool hold ‘alt + shift’ to copy this layer vertically. Then free transform (ctrl + t) it and flip it vertically.
Step 21
Cut the top of the building three from the right with the triangular top a quarter of the way down and position it on top of the ‘I’ building.
Step 22
Add a layer mask to the top layer and blend in the edges with a soft black brush, using a pen tablet really helps here.
Step 23
Now we’ll create the final letter ‘B’. From the original image of the city, cut out the triangular shaped building below the ‘B’.
Step 24
Using the move tool and holding down ‘alt’ copy the cut out so it covers the right side of the ‘B’ like the following image. Now add a layer mask to each cut out, select the text and add a layer mask to the letters. The buildings should have a slight 3d effect because of the angle of the photograph.
Step 25
Now we’ll make up the rest of the ‘B’ using the same methods as the other letters. We’ll finish the rest of the ‘B’ by filling in the gaps with cut outs from the building, adding in the back of the ‘B’ and middle areas.
Step 26
With the ‘B’ finished we’ll add a Gradient Fill Adjustment Layer on top of all the layers with the first stop set to #a0050a and the last transparent at – 90 degrees. Then add another a Gradient Fill Adjustment layer on top of all the layers with the first stop set to #fbda3e and last set to transparent, at 90 degrees.
Step 27
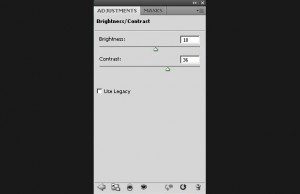
For each group that makes up the letters, we’ll change the brightness and contrast starting with the ‘B’. Copy the group and merge it, then add a Brightness/Contrast adjustment layer and clip it to the merged group, set the brightness to 24, and contrast to 15. For the ‘I’ set the brightness to 20 and contrast to 35. And for the ‘M’ set the brightness to 18 and contrast to 36. Lastly, add an adjustment layer on top of all layers set to brightness 27 and contrast 8.

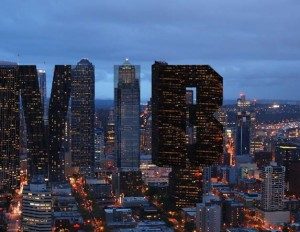
And we are done
Thank you
2,212 total views, 1 views today
Share this On


